Adding Groups
Admin groups allow you to organize administrators by their roles and responsibilities, and to assign specific permissions to each group. This ensures that admins only have access to the features and data necessary for their job, supporting both security and operational efficiency.
How to Create an Admin Group
-
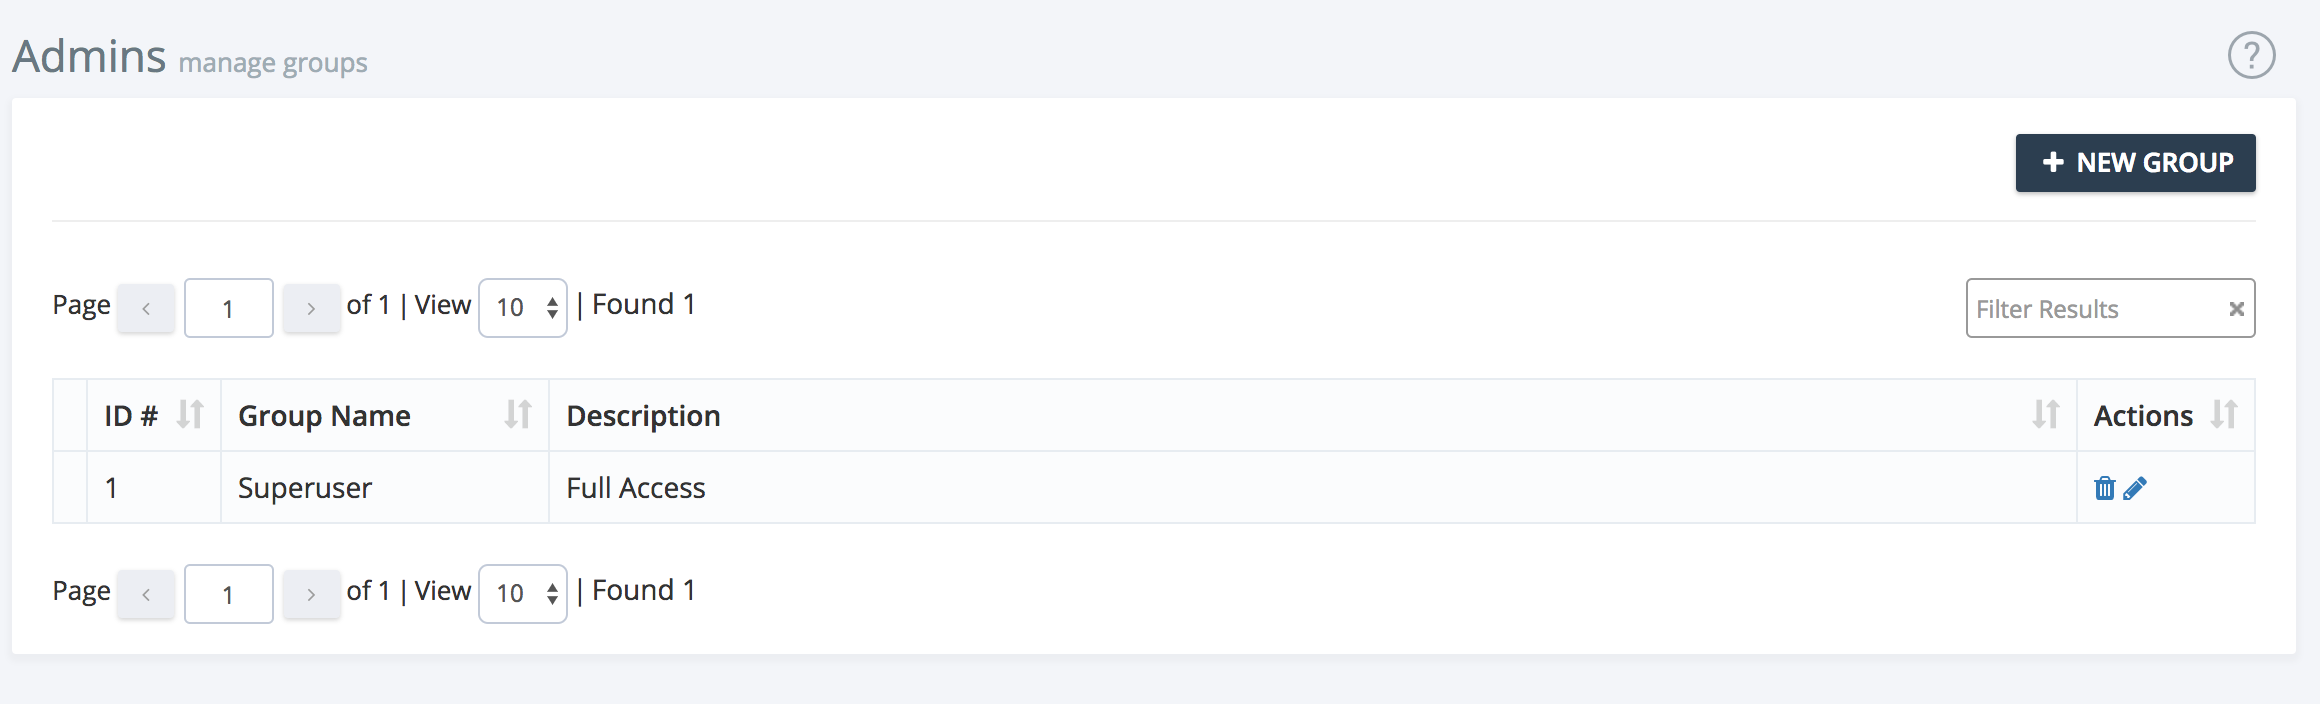
Navigate to the Groups Section
Access the Admin Groups page and click the help link for this guide. -
Start a New Group
Click the New Group button to begin creating a group.
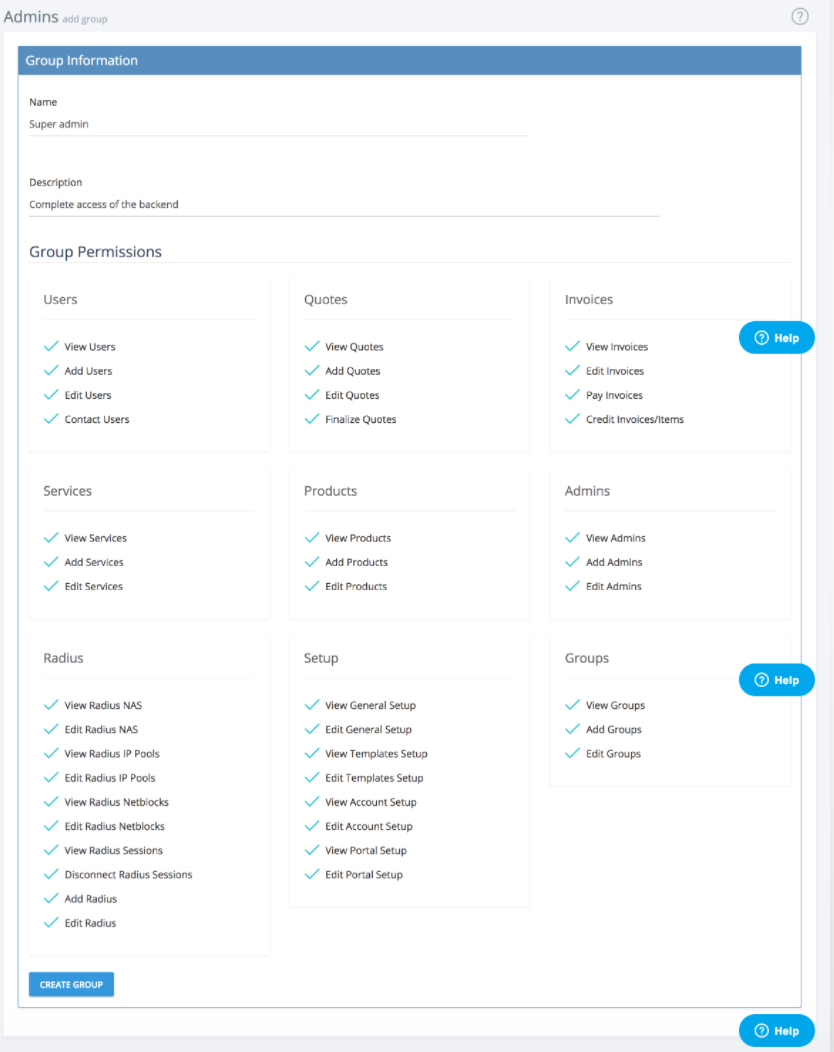
- Enter Group Details
- Name: Give your group a clear, descriptive name.
- Description: Briefly describe the group’s purpose or scope.
- Permissions: Use the checkboxes to enable or disable access to various sections of the system. For example, you may allow some groups to view reports but not edit billing settings.
Tip: When granting "Edit" rights, you should also enable "View" rights for the same section.
-
Create the Group
Once you have configured the group’s permissions, click Create Group. You will be taken to the Edit Group page for further adjustments if needed. -
Assign Admins to Groups
You can assign admins to groups when creating or editing their user profiles. This controls their access throughout the system.
Admin groups are a powerful way to manage access and maintain security. Review group memberships regularly to ensure admins have the appropriate permissions.